Wednesday, 31 August 2011

How to access Gmail mails offline.

This was been asked by users many many times to google. Google enabled it. But soon the rolled back the feature due to some problem. Still this is a hot question asked by many many gmail users:
HOW TO ACCESS GMAIL OFFLINE
For many days I too have been searching a solution for this problem. And finally I found the solution. Its just a chrome extension that enables you to work offline in gmail. Even this extension has been created by Google officially. They have even announced it on the Gmail blog. So here is how you access gmail offline.

Thing you will need :

1. Chrome Browser

2. Internet connection to install the app.

3.Gmail account to access.

So lets see on how to add this extension and set it up for working in offline mode..

1. Open up your browse (Chrome or chromium)

2. Navigate to this page.

3. Click on the add to chrome button there so that it starts to download and completes installation of the extension in your browser.


4. After it has installed a new tab will open up and you will see the Offline Google Mail there below the apps tab.


5. Click on that and now you will be taken to a page where you are gonna set it up.

6. You will be shown the following page.


7. Click on the allow offline mail option and then the continue. If this page dint appear then you might probably have to login to your google account and then continue to this step.

8. And yes now you are in your inbox. Disconnect your internet connection and try it out.

Advantages of using this app :

1. You can view your mails offline.

2. The speed is really amazing.

3. You can compose mails offline which will be sent the next moment you connect your internet.

4. The advantage of it over thunderbird and outlook is that it does everthing at a jet speed.

5. The appearance is cool.

6. Greatly customizable.

7. You will be able to access everything that you can access from your gmail account except that of chat.

8. The appearance, the offline accessibility and speed are the reasons why I prefer it over Gmail, Outlook and Thunderbird.

Hope you guys too liked it. Post your views as comments. And happy mailing... :)

Tuesday, 30 August 2011

How to install android on your PC.

Android is one of the most poular mobile OS found in the market. iOS is a huge competition for android. But however android is free of cost. That single feature would easily defeat iOS. Most of the people in India dont have an android mobile and they are just waiting to see the appearance of android including me. Even I am a crazy fan of android and I too love to see the appearance of it. A few days back I got a tutorial on how to install android on a pc. I thought that it wouldn't work. But to my surprise I successfully installed android and it now dual boots along with ubuntu on my system. Now I am here to share about the topic. Now lets get started.

Things You Will Need :
  • Android x-86 (Download link below)
  • A PC
  • A pendrive or any other memory devices
  • Unet Bootin (Download link below)
Now lets start to install it.

1. Download a copy of Android x-86 from the official android website. You can download it from here.

2. Download the latest release. (the size would be upto 50 - 60 MB)

3. Now you have to download Unet Bootin. Download Link

4. Open Unet Bootin and you will see the following screen. Change the Disk Image to ISO and browse for the ISO file that you have downloaded from android official website. Change the Type to USB drive and change the drive letter to your USB drive's letter.


5. Click on the OK button. The process will take a few seconds or minutes depending on the speed of your computer.

6. Now reboot your system and enter your BIOS. Change the Boot Priority so that USB drive comes first followed by hard drive or CD drive depending on your wish.

7. Now reboot your system. Your system will boot from your USB drive and the following screen will be in front of you.


8. Now click on the Run Android without installation if you wanna run it without installing on your hard disk. If you wanna install it, click on the fourth option and continue the installation process. Its similar like that of normal operating systems.
If you are running from the live CD then you must see the following screen. (Android Desktop)


Now you are looking at your android desktop. Note that android might not that much efficient on some PC's. You can also use the android maket.

So just enjoy having it...

How to get more traffic to your blog - The power of keywords.

Bloggers are really growing in a great number day by day. Here is a quote said by an old blogger "Newbie bloggers are not knowing about the importance of SEO". So why dont you prove that the statement is wrong. Driving traffic is a bit difficult task according to me and it would be difficult for a newbie blogger to understand the core concepts of blogging, SEO, keywords etc. Now I am here to help you guys by giving a complete tutorial on what are keywords and how are they used and how to use them.

WHAT ARE KEYWORDS ?

Most of the new bloggers have this great doubt that what are keywords. Keywords are some of the important terms that you use in your blog posts and in your blog. They are not just some random terms but the terms that search engines are able to track or crawl. You might have noticed that when you type something in a Google search you will find that some results will turn up. These results turn up only because of these keywords. You content must be rich with keywords only then your blog will get higher results in search engine results.

HOW TO FIND KEYWORDS FOR YOUR BLOG ?

Things you will neeed :
  • A blog.
  • Internet connection 
  • And a few minutes of free time.
I have explained you guys what are keywords. Now lets see on how to find keywords that are suitable for your blog.

1. Open up your browser.

2. Navigate to this URL.

3. Now you will be redirected to Google Adwords site where you can find your keywords.


4. In the word or phrase column type some of the categories or tags of your site. Enter your sites URL in the website column. Enter the captcha and click on the search button.

5. Now they will show some of the keywords that are related to your blog and they will also show the competition for the keywords.

USING THE KEYWORDS.

Now that you have found out your keywords. The thing that you have to do is to use these keywords in your blog posts and also create categories for the top keywords and use those keywords often in your post. But see to that you make meaningful sentences. So be careful. Use the keywords efficiently.

Other tips on SEO :

1. Add meta tags to your blog.

2. Configure your robots.txt file if you are a wordpress blogger.

3. Use All in one SEO pack plugin if you use wordpress.

There are many many tips and tricks to make your blog more SEO optimizable. Just google it and you can find millions of results... Enjoy blogging. :)

Friday, 26 August 2011

Add a Featured post slider to your blogspot blog.

Blogspot is really a good platform for blogging. You can easily create a blog and also you can easily maintain it using  blogspot even if you are a nerd. Blogspot has certain disadvantages when compared to that of wordpress. The most important of these includes featured sliders and a few other things. In wordpress you can do it with plugins which are available in the wordpress directory. But in the case of blogspot you have to add some codes into your template for those featured sliders to appear. Now lets look on how to add a featured slider in your blogspot blog.

1. Login to your blogspot account.

2. Navigate to Design > Edit HTML.

3. DONT FORGET TO BACKUP YOUR TEMPLATE.

4. Now you are gonna add some CSS codes into your template. Find the following code in your template.

]]></b:skin>

5. Add the following piece of code just above that.

/*Start Slider Css*/
#slider-wrapper {
background:url(https://blogger.googleusercontent.com/img/b/R29vZ2xl/AVvXsEj2lu2lhtv1qhDeAnTbupA3jrg2mzmkZeimRyEPssznD7li5mfSY74LQZa6eOgL4W30IWfBmnE2wXTefWoITW0HpL8Z3BaocuH1BIba9FV2cullIKitsOuEvJ5YdHfg8fXpOanYGlfizU8T/s1600/loading.gif) no-repeat;
width:998px;
height:392px;
margin:0 auto;
padding-top:74px;
margin-top:50px;
}
#slider {
position:relative;
width:618px;
height:246px;
margin-left:190px;
background:url(https://blogger.googleusercontent.com/img/b/R29vZ2xl/AVvXsEj2lu2lhtv1qhDeAnTbupA3jrg2mzmkZeimRyEPssznD7li5mfSY74LQZa6eOgL4W30IWfBmnE2wXTefWoITW0HpL8Z3BaocuH1BIba9FV2cullIKitsOuEvJ5YdHfg8fXpOanYGlfizU8T/s1600/loading.gif) no-repeat 50% 50%;
}
#slider img {
position:absolute;
top:0px;
left:0px;
display:none;
}
#slider a {
border:0;
display:block;
}
.nivo-controlNav {
position:absolute;
left:260px;
bottom:-42px;
}
.nivo-controlNav a {
display:block;
width:22px;
height:22px;
background:url(https://blogger.googleusercontent.com/img/b/R29vZ2xl/AVvXsEh6dVgqZRQplOA2asmWzCjFQUTc8KO7WrYaz8Ch3_lvgqOBzObnBhyphenhyphenU-l9gPgdWDCl0J2JZu4WfQWlIhlsiC1-tbRTHaZpfBHMvCEHBa2gKzBTNYEn52IyYx1M5gZ5ygKkzF2jK4qRTKZgn/s1600/bullets.png) no-repeat;
text-indent:-9999px;
border:0;
margin-right:3px;
float:left;
}
.nivo-controlNav a.active {
background-position:0 -22px;
}
.nivo-directionNav a {
display:block;
width:30px;
height:30px;
background:url(https://blogger.googleusercontent.com/img/b/R29vZ2xl/AVvXsEiU88UKH2OiEGtnq892m4tJwPoPguHb65uMESDKTQ4guGBCPPmXrtT7qiK3ZP1TcMEL72fJ-Ey2NNq0ilALP6HXC4YyMXccii7m43GpcPwtHgUhi5s_pdUeuI-bb5WXAqTUBKWCLhY3Libf/s1600/arrows.png) no-repeat;
text-indent:-9999px;
border:0;
}
a.nivo-nextNav {
background-position:-30px 0;
right:15px;
}
a.nivo-prevNav {
left:15px;
}
.nivo-caption {
text-shadow:none;
font-family: Helvetica, Arial, sans-serif;
}
.nivo-caption a {
color:#efe9d1;
text-decoration:underline;
}
/* The Nivo Slider styles */
.nivoSlider {
position:relative;
}
.nivoSlider img {
position:absolute;
top:0px;
left:0px;
}
/* If an image is wrapped in a link */
.nivoSlider a.nivo-imageLink {
position:absolute;
top:0px;
left:0px;
width:100%;
height:100%;
border:0;
padding:0;
margin:0;
z-index:6;
display:none;
}
/* The slices and boxes in the Slider */
.nivo-slice {
display:block;
position:absolute;
z-index:5;
height:100%;
}
.nivo-box {
display:block;
position:absolute;
z-index:5;
}
/* Caption styles */
.nivo-caption {
position:absolute;
left:0px;
bottom:0px;
background:#000;
color:#fff;
opacity:0.8; /* Overridden by captionOpacity setting */
width:100%;
z-index:8;
}
.nivo-caption p {
padding:5px;
margin:0;
}
.nivo-caption a {
display:inline !important;
}
.nivo-html-caption {
display:none;
}
/* Direction nav styles (e.g. Next & Prev) */
.nivo-directionNav a {
position:absolute;
top:45%;
z-index:9;
cursor:pointer;
}
.nivo-prevNav {
left:0px;
}
.nivo-nextNav {
right:0px;
}
.nivo-directionNav a {
display:block;
width:30px;
height:30px;
background:url(https://blogger.googleusercontent.com/img/b/R29vZ2xl/AVvXsEiU88UKH2OiEGtnq892m4tJwPoPguHb65uMESDKTQ4guGBCPPmXrtT7qiK3ZP1TcMEL72fJ-Ey2NNq0ilALP6HXC4YyMXccii7m43GpcPwtHgUhi5s_pdUeuI-bb5WXAqTUBKWCLhY3Libf/s1600/arrows.png) no-repeat;
text-indent:-9999px;
border:0;
}
a.nivo-nextNav {
background-position:-30px 0;
right:15px;
}
a.nivo-prevNav {
left:15px;
}
/* Control nav styles (e.g. 1,2,3...) */
.nivo-controlNav a {
position:relative;
z-index:9;
cursor:pointer;
}
.nivo-controlNav a.active {
font-weight:bold;
}
.nivo-controlNav a {
display:block;
width:22px;
height:22px;
background:url(https://blogger.googleusercontent.com/img/b/R29vZ2xl/AVvXsEh6dVgqZRQplOA2asmWzCjFQUTc8KO7WrYaz8Ch3_lvgqOBzObnBhyphenhyphenU-l9gPgdWDCl0J2JZu4WfQWlIhlsiC1-tbRTHaZpfBHMvCEHBa2gKzBTNYEn52IyYx1M5gZ5ygKkzF2jK4qRTKZgn/s1600/bullets.png) no-repeat;
text-indent:-9999px;
border:0;
margin-right:3px;
float:left;
}
/* End Slider Css*/


6. Now again search for the following piece of code in your template.

</head>

7. Copy the following code right above the head tag.

<script src='http://code.jquery.com/jquery-1.6.1.min.js' type='text/javascript'/>
<script src='http://yourjavascript.com/8855314511/jquery.nivo.slider.pack.js' type='text/javascript'/>
<script type='text/javascript'>
$(window).load(function() {
$(&#39;#slider&#39;).nivoSlider();
});
</script>


8. If you already have jQuery installed in your template remove the red coloured  line at the top or else just ignore this step.

Now that we have completed adding all our CSS coding. Now lets move on to add the HTML part.

1. Navigate to Design > Page elements.

2. Add a HTML / Java Script gadget and place the following code into it.


&lt;div id="slider">
&lt;a href="http://cyberfreax.tk">&lt;img src="https://blogger.googleusercontent.com/img/b/R29vZ2xl/AVvXsEiUoadddBCs9Op6RyxWRzdv99TdeQK3IS2Z5MAK2jWNKf_Zdjr7EbwYxarv233SrVl9rJnnyr4g5jLsRE2bmwC6um-ufHvGJyZkOVMFGauZ_I9jPPL5fQk381n7eE-xKbR1OWxI5PSO-_Yo/s1600/plus.png" title="This Is A Caption" />&lt;/a>

&lt;a href="
http://cyberfreax.tk">&lt;img src="http://www.mosquitodefense.net/Pictures%20Used/facebook_logo.png" title="This Is Another Caption" />&lt;/a>

&lt;a href="
http://cyberfreax.tk">&lt;img src="http://seahawksblog.files.wordpress.com/2011/01/twitter_logo.jpg" title="This is an example of a caption" />&lt;/a>

&lt;a href="
http://cyberfreax.tk">&lt;img src="http://www.theblackandblue.com/wp-content/uploads/2011/07/google-plus-logo1-640x312.jpg" title="This is another Caption" />&lt;/a>
&lt;/div>

Now that you have added the codes. Lets start making changes in it. The code lines which are colored in red are the URL, Image and the caption. Change the URL image and caption according to your needs and save the widget. 

7. Now drag and drop the widget so that it appears in the top of the blog posts widget. See the pic for a better understanding.


8. Save it. And thats it you are off now.

Enjoy using your featured slider. Post your queries or reviews...

Thursday, 25 August 2011

Add an outstanding "Related posts " widget to your blog.

Blogging is really an interesting hobby. But you must be really smart enough to generate traffic. And you must make your blog completely SEO optimised so that it is easily crawled by search engines. Which would eventually lead to more and more traffic. There are lots and lots of ways to make your blog SEO optimised. Here is one of the trick so that your blog becomes better in SEO. This widget not only SEO optimises your blog but also asks readers views on your post. This widget is really attractive and also it can be added to any blogs which has any different type of style sheets. Now lets see on how to add this widget to your blogger blog. This widget also supports many blogging platforms like wordpress, blogspot, drupal etc. So lets get started :

THING YOU WILL NEED :

1. Browser

2. Internet connection

3. A blog which you maintain.

GETTING INTO THE PROCESS :

1. Open up your browser.

2. Navigate to this URL.

3. Now fill up the form and click on the "Register" button.

4. Activate your account using the link that you got in your mail inbox.

5. After you have activated click on add to your site link.

6. Click on your blogs platform. Enter the URL of your blog and click on the "Submit query" button.

7. Now they will ask for the owner confirmation. Confirm your ownership. The method differs from platform to platform.

8. Now in the top you can two options called as "Already have" and "Yes"

9. Click on Yes.

10. Enter your platform. See up to your preferences, accept to their terms and click on the continue button.

11. Now save changes for your blog and that's it you are ready to go.

Dont forget to complete the step 6 otherwise the widget would not appear. So be careful. Any queries post them as comments....

Monday, 22 August 2011

How to add HTML signatures in Gmail.

Hey there guys. Gmail is one of the best email services available there. And Firefox is one of the best browser standing next to IE. You might have seen people sending emails along with signatures which are very attractive and that they can be created only with HTML. So why dont you create your own HTML signature with your own HTML knowledge. I just love to send emails with HTML signatures since they are really really attractive. So now lets see on how to create it.

Things you will need :

1. Gmail account.

2. Firefox browser

3. Firefox addons (Links given below)

4. HTML knowledge. (If you are gonna use the second addon you dont need that too.)

So now lets get started :

1. Open up your firefox browser.

2. Now install this addon.

3. Open up your Gmail account.

4. And click on the compose mail option.

5. Now in here you will see two icons to the top of the "To" field.

6. Click on the Add a new signature icon which is one the left most.

7. A new text field will appear below the To field where you have to enter your HTML code and you have to click on the save button.

8. Below is the code which I used. You can edit it.

<head>

        <link rel='stylesheet' href="http://crackingsoftwares.my3gb.com/about-author.css">

    </head>

    <body>

    <div class="mydiv">

        <img class="myimage" src="YOUR IMAGE LINK"/>

        YOUR DESCRIPTION

    </div>

Dont forget to replace YOUR IMAGE LINK with the link of your image and replace YOUR description with a small description of yours. Now click on the save button.

The code above displays just a simple image and this wont be that much attractive. So now lets do something more interesting.

1. Open up Firefox.

2. Download and install this plugin.

3. After the browsers navigate to Gmail.

4. Now in the top right near your settings you will see an option called as Wise-Stamp.


Click on the edit signature which appears when you click on it.

5. A new window will open up saying Wise Stamp Preferences.

6. This is where you have to edit your signature.

7.Complete editing your signature.

8. And click on the "Ok" button.

A message saying the success will appear and that's it you are done. Now whenever you send an email your signature will appear below and now you are ready to go. Enjoy your signature :)

Thursday, 18 August 2011

How to create a facebook application for your Blog.

Facebook is the worlds greatest social network and it has more than 750 million users. So it is necessary for a blogger to create a facebook page that he will surely have. And how about creating a facebook app. Yes guys. You might have seen and you might have used many many apps as a facebook user. Creating a facebook app is really easy and that you should have some basic knowledge on web designing languages. And if you have a good knowledge you can easily create really great apps. If your becomes famous then facebook might pick you up for an internship. But lets not go that complex. Now we will be creating an app that will let users to see your blogs feed and they will also be able to subscribe to it. So lets get started :

1. Lets assume that you have a facebook account. Just login to it and navigate to the following URL :

http://developers.facebook.com/apps

2. Now in this page click the "Create a new app" button in the top right.


3. Enter the name of your app. Accept to the terms and conditions. Click on the Continue button.

4. In the following page enter all the details accordingly.

5. Now open up your notepad. You will have to write some codes for showing up your feed.

6. And before that you have to get your Buzz Boost  codes. For that do the following
  • Login to your feed burner account where you have burnt your feed
  • Open up your feed.
  • Navigate to Publicize > BuzzBoost
  • And add your preferences there and get the code.
  • Set the number of posts to be showed as 10 so that it looks good in your facebook page.
7. Now that you have got your Buzz Boost code. Now open up your notepad and enter the following codes .


<html>
<body>
<style>
.burner{
font-family: 'Trebuchet MS';
border:3 px dotted #CCCCCC;
font-size:12px;
color:#000000;
font-weight:normal;
text-align:left;
padding:2px;
margin:4px;
}
.burner a{
font-size:17px;
color:#686868;
font-weight:bold;
}
.burner a:hover{
color:#CC0000;
}
.burner a:visited{
color:#686868;
}
</style>
<div style="float: left; width: 500px;
  margin: 5px; padding: 5px; border: 1px solid black;">
<div class="burner">
BUZZ BOOST CODES HERE
</div></div>
FACEBOOK LIKE BUTTON HERE
</body>
</html>

8. Replace "BUZZ BOOST CODES HERE" with your Buzz Boost codes and replace "FACEBOOK LIKE BUTTON HERE" with your facebook like button.

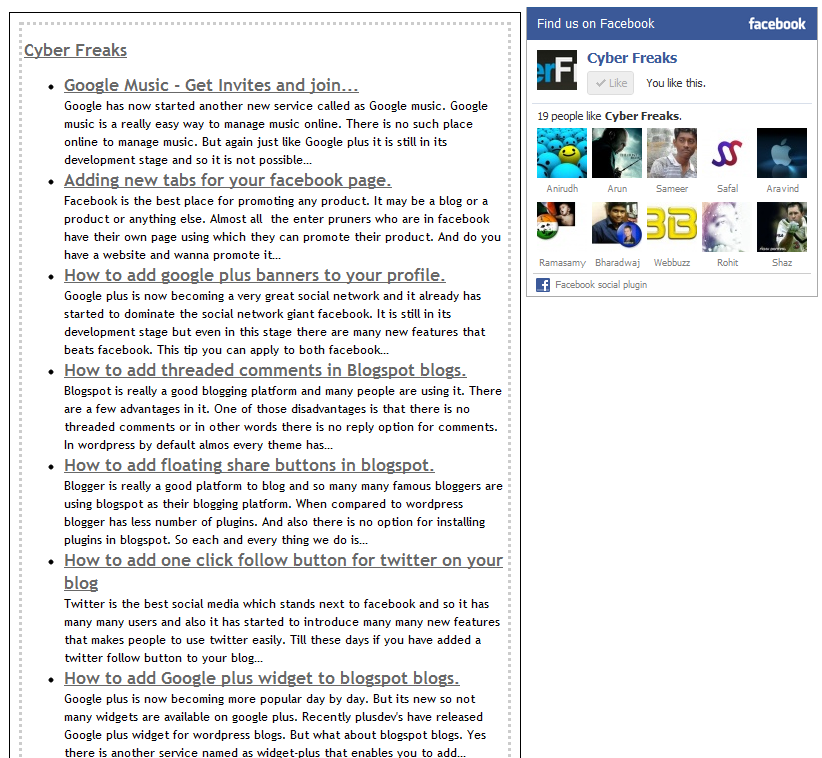
9. You can also add other widgets that you wanna add to your facebook app by just adding the HTML code below the facebook like button code. The appearance for the above codes will look like the following :


10. Now save the document with a .html extension.

11. Upload the file anywhere online. And get the URL.

THINGS TO REMEMBER WHILE UPLOAD A FILE ONLINE :

1. I have uploaded my files in my3gb.com
2. Go to my3gb.com and create an account.
3. Go to your control panel and from there to your file manager.
4. Click on create a new directory and name it. (i have named as Cyber Freaks)
5. Rename your HTML document as index.html and upload the file into that directory.
6. Now open that file from my3gb.
7. Your file will be redirected to an URL as follows :

http://example.my3gb.com/Your%20Directory/index.html

Replace Example with your domain that you got while registering with my3gb and replace "Your" with the first name of your directory and "Directory" with the second name of your directory. If your directory does not have any second name then remove "%20Directory".

Do all modifications and note down that URL.

12. Now come back to facebook.

13. Click on the "On Facebook" link on the left sidebar.

14. In the page you will be asked to add some details. Enter the details as follows.

Canvas Page : Your own preference

Canvas URL : The URL of your hosted HTML file that you got in step 3.6. (Dont forget to add trailing slashes)

Secure Canvas URL : The URL of your hosted HTML file that you got in step 3.6. (with https:// instead of http://. If this does not work then leave that area blank)

Tab URL : The URL of your hosted HTML file.

Secure Tab URL : The URL of your hosted HTML file that you got in step 3.6.  (with https:// instead of http://. If this does not work then leave that area blank)

And now save the changes. And thats it your app is ready now. Now lets add it to your facebook fan page.

1. In the page in the bottom of the left side bar you will see a link called as "View application profile page"

2. In the bottom of the left sidebar you will see a link as "Add to my page" Click on that and a list of your pages will appear. Click on the page that you want your application to be added and click close.

And thats it you have created your app and added it to your page. Any queries post them as a comment and enjoy blogging !! :)